Table of Contents
ToggleBuilding a deck around a tree isn’t just a design compromise, it’s a chance to turn a mature shade tree into the centerpiece of your outdoor space. Instead of removing a healthy oak or maple that’s been growing for decades, smart deck design lets homeowners preserve canopy cover, add shade, and create a built-in focal point. The trick is planning for tree growth, choosing the right cutout dimensions, and building a structure that won’t strangle roots or girdle the trunk as the tree expands. This guide walks through practical design options, critical planning steps, and construction tips for building a deck that works with nature instead of against it.
Key Takeaways
- A well-planned deck around a tree preserves canopy shade, reduces surface temperatures by 10–15°F, and eliminates costly tree removal while creating a natural focal point for your outdoor space.
- Proper cutout sizing requires adding 4–6 inches of clearance on all sides of the current trunk diameter to allow 20 years of growth without compressing the bark or creating disease entry points.
- Deck footings must be placed outside the critical root zone (1.5 times the canopy drip line) using methods like helical piers or grade-level blocks to avoid severing structural roots and destabilizing the tree.
- Load-bearing integrity around tree decks is maintained by framing a double or triple joist box around the trunk with extra blocking and hangers to redistribute structural loads safely.
- Creative deck around tree ideas—from circular cutouts with integrated benches to multi-level platforms connecting multiple trees—transform potential obstacles into functional, visually striking design features.
- Material selection matters: composite decking resists moisture and decay better than wood in the moist microclimate beneath a tree canopy, though pressure-treated lumber remains the most budget-friendly framing option.
Why Build a Deck Around a Tree?
Mature trees offer benefits that new construction can’t replicate overnight. A 30-year-old tree provides instant shade, lowers surface temperatures by 10–15°F in the immediate area, and adds property value that young saplings won’t match for decades. Removing a tree to build a deck often means sacrificing cooling costs, privacy screening, and wildlife habitat.
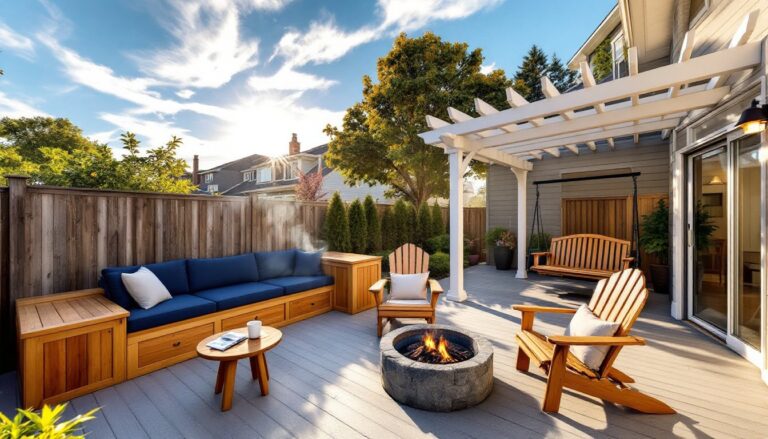
From a design perspective, trees create natural vertical elements that break up horizontal deck surfaces. They offer anchor points for string lights, hanging planters, or shade sails. A well-designed tree cutout turns what could be an obstacle into a conversation piece, especially when paired with integrated seating or tiered levels.
There’s also the practical side: many municipalities have tree preservation ordinances that restrict removal of trees above a certain diameter (commonly 6 inches DBH, diameter at breast height). Building around a protected tree may be the only legal option. Even without regulations, mature trees contribute to stormwater management by absorbing runoff that would otherwise sheet off a solid deck surface.
Finally, tree decks solve the common problem of unusable yard space. Homes with large trees in the middle of a potential patio area can integrate the trunk instead of losing square footage. This is especially useful on smaller lots where every usable foot counts.
Planning Your Tree Deck: Key Considerations Before You Build
Before cutting the first board, homeowners need to address structural and biological concerns. Trees aren’t static objects, they grow, sway, and interact with soil in ways that conflict with rigid deck framing.
Root protection is the first priority. Deck footings must be placed outside the critical root zone (CRZ), which extends roughly 1.5 times the canopy drip line. Digging footings inside the CRZ can sever major structural roots, destabilizing the tree or causing decline. For species like oaks, which are particularly sensitive to root disturbance, consider using helical piers or grade-level deck blocks placed on undisturbed soil instead of traditional concrete footings.
Load-bearing requirements don’t change just because there’s a tree involved. Deck joists still need to meet IRC span tables for the chosen material and spacing (typically 16 inches on center for pressure-treated lumber). The challenge is routing joists around the trunk without creating weak spots or undersupported cantilevers. Many builders frame a double or triple joist “box” around the tree cutout to redistribute loads. This means adding extra blocking and hangers, which increases material costs but maintains structural integrity.
Permit requirements vary by jurisdiction, but most areas require permits for decks above 30 inches in height or those attached to the house. Some locales also require an arborist’s report if the deck encroaches on protected trees. Check with the local building department before framing, retrofitting a non-compliant deck is expensive.
Tree species matter. Fast-growing species like silver maples or willows can add 2–3 inches of trunk diameter per decade, while slow-growing oaks might add less than an inch. Consult an arborist or refer to regional growth charts from Southern Living to estimate long-term expansion. Softwoods like pine are more flexible during wind events, while hardwoods like oak have stiffer trunks that exert more lateral force on a surrounding deck.
Tree Growth Allowance and Cutout Sizing
The cutout diameter is the single most important measurement. Too tight, and the deck will compress the trunk within a few years, causing bark damage and creating entry points for disease. Too generous, and the gap becomes a tripping hazard or allows debris accumulation.
Standard practice is to add 4–6 inches of clearance on all sides of the current trunk diameter. For a tree measuring 12 inches across, that means a cutout of 20–24 inches. This accounts for roughly 20 years of growth for most moderate-growth species. If the tree is young or fast-growing, increase the allowance to 8–10 inches per side.
Some builders use a two-piece cutout frame with removable decking boards around the trunk. This allows future adjustments without tearing up the entire deck. The framing stays fixed, but the surface boards can be swapped for wider pieces as the tree expands.
Avoid rigid collars, edging, or decorative rings that contact the bark. These create girdling points and trap moisture. Instead, leave the cutout open or use flexible materials like rubber mulch rings that compress as the tree grows. For a cleaner look, some designs incorporate a gravel-filled border inside the cutout, which provides drainage and visual definition without touching the trunk.
Don’t forget vertical clearance. Low branches will continue to thicken and drop. If a branch currently clears the deck surface by 6 inches, plan for it to drop another 2–3 inches as the limb gains weight. Prune selectively with an arborist’s guidance, but never top a tree to fit a deck design, it weakens the structure and invites decay.
Creative Deck Around Tree Design Ideas
Once the technical planning is done, the design phase offers room for creativity. These concepts balance aesthetics with the practical demands of tree growth and deck maintenance.
Circular Cutout Decks with Integrated Benches
A circular cutout is the most common approach. It evenly distributes growth space and creates a soft visual contrast against the straight lines of decking. Pair it with a wraparound bench that follows the curve, and the tree becomes a natural backrest.
Build the bench frame using the same pressure-treated lumber as the deck joists (2×6 or 2×8), and face it with decking boards. Keep the bench seat 6–8 inches away from the trunk to prevent bark contact. For added function, install a hinged seat lid over part of the bench for hidden storage, ideal for cushions or garden tools.
Circular cutouts work best with composite or PVC decking, which bends more easily than wood for curved edge trim. If using traditional lumber, plan for miter cuts every 6–8 inches along the curve, or use a kerfing technique (cutting shallow grooves on the backside) to flex the board. Some deck builders feature designs that incorporate circular cutouts and curved benches, showing how the technique adapts to different tree sizes.
For lighting, recess low-voltage LED strips under the bench lip or aim uplights at the canopy. This highlights the tree at night and adds ambiance without requiring overhead fixtures.
Multi-Level Decks for Multiple Trees
If the yard has two or more mature trees, a multi-level deck can connect them while accommodating different root zones and trunk positions. Each level steps down 6–12 inches, with the trees emerging from their own platforms.
This design requires careful joist planning. Each level functions as a semi-independent structure with its own support posts and beams. Use stair stringers or transition treads between levels to meet code (IRC requires landings every 12 feet of vertical rise, though most deck level changes are well below this).
Multi-level decks also solve grading challenges. If one tree sits on a slope, stepping the deck prevents excessive post height on the low side. It’s easier to build two 4-foot-high platforms than one 8-foot-high single-level deck.
Material costs increase with level changes due to extra framing and stair components, but the result is visually dynamic. Paint or stain each level a slightly different tone (e.g., weathered gray transitioning to cedar tone) to emphasize the tiered effect, or keep it uniform for a cohesive look.
Materials and Construction Tips for Tree Decks
Material selection affects both longevity and how the deck interacts with the tree. Pressure-treated pine remains the most cost-effective option for framing, rated for ground contact and available in standard dimensions (actual 2×8 measures 1.5″ × 7.25″). For decking surfaces, consider composite boards, which resist rot and insect damage better than wood, important in the moist microclimate under a tree canopy.
If using natural wood decking (cedar, redwood, or tropical hardwoods like ipe), apply a water-repellent stain annually. Tree canopies trap moisture and shed organic debris, accelerating wood decay. Composite decking eliminates this maintenance cycle but costs roughly $3–5 per linear foot more than treated lumber.
When framing around the trunk, use joist hangers rated for the load (Simpson Strong-Tie or equivalent). Standard 18-gauge hangers work for most residential decks, but verify the load tables. Double up joists on both sides of the cutout and add blocking every 24 inches to prevent twist.
Fastener choice matters. Use galvanized or stainless steel screws rated for exterior use. Avoid nails in high-stress areas like the cutout frame, screws provide better shear resistance and won’t back out as the tree sways. For composite decking, follow the manufacturer’s fastener specs: many require proprietary hidden fastener systems to maintain warranty coverage.
When cutting the deck surface opening, use a jigsaw for curves or a circular saw for straight segments. Mark the cutout from underneath the deck before installing surface boards, it’s easier to adjust framing before the top is locked in. Sand cut edges smooth to prevent splinters, and seal end grain with deck stain or paint to slow moisture absorption.
Safety gear is non-negotiable: safety glasses (especially when cutting treated lumber, which can splinter), work gloves, and a dust mask when sawing composite materials (the dust is fine and irritating). If working above ground level, use proper fall protection or scaffolding, don’t lean off a ladder with a circular saw.
For those seeking additional outdoor project ideas, resources like Hunker offer design inspiration and practical guides that complement hands-on deck building.
Final assembly tip: Leave the cutout boards as the last pieces installed. This gives flexibility to adjust the opening size if the framed hole doesn’t align perfectly with the trunk. Mark, cut, test-fit, then fasten. A tight fit looks professional: a sloppy gap looks like a mistake.